ModuBat Setup Guide
System Overview & Default Configuration
Out of the box, your ModuBat arrives pre-configured for a 152mm tile opening using the all-orange bumper setup. This default sizing is tailored to fit standard 6-inch ceramic wall tiles, such as the widely available Home Depot Daltile series. If you are using standard Daltile stock, no initial adjustments are necessary.
Installing the Tile
Start by ensuring that the ejector slide is moved to the outermost position. To install a tile, start by inserting one edge and press down evenly until the tile rests flush against the base. The bumpers provide a snug fit to keep the tile locked in place while throwing, without requiring excessive force during placement.
Ejecting the Tile
To safely remove a tile after throwing, locate the ejection slider along the edge of the bat frame. Hold the bat frame down while pressing the slider inward to pop the tile out without disturbing your finished piece.
Bumper Removal and Swapping
To adjust the inner dimensions of your ModuBat, swap or rearrange the corner bumper inserts. Slide the included tool onto the bumper, and pry downward to release the bumper. Ensure the receiving channels are free of clay slurry before pressing the new bumper configuration firmly into place. The tool may be used to aid in installing the replacement bumper.
Ejector Maintenance & Cleaning
Over time, clay slurry and debris can build up beneath the ejector mechanism. Periodic removal and cleaning ensure the slide operates smoothly without sticking. To remove the slide, press down on the outside tab while moving it inward, allowing it to slide past the inner stop. To re-install, repeat the process in reverse, sliding until the tab pops past the inner stop.
Bumper Configuration Table
Different tile manufacturers produce standard "6-inch" tiles with slight variations in exact dimensions. Use the reference guide and table below to identify the bumper combination needed for your specific tile stock. You may need to experiment to find the perfect size for your specific tiles. The tile should be snug, but it should not require a lot of force to install the tile.
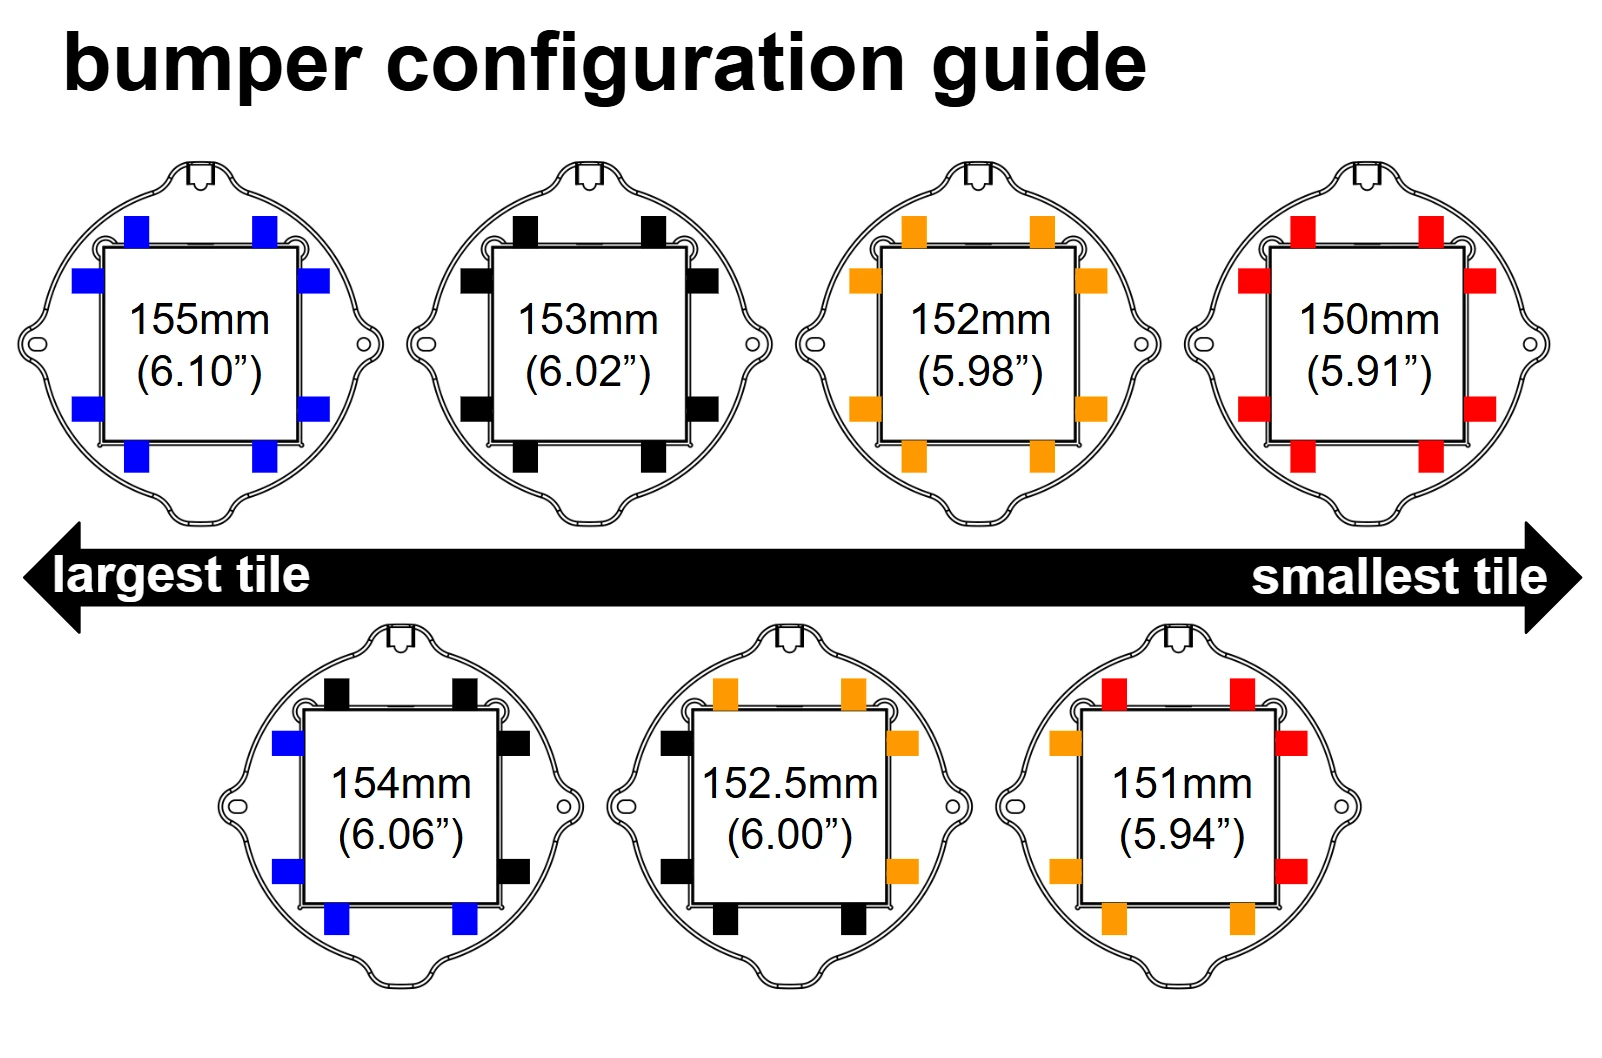
| Inner Opening | Bumper Combination | Compatible Tile Types & Notes |
|---|---|---|
| 155 mm (6.10") | All Blue Bumpers | Oversize 6" tiles |
| 154 mm (6.06") | Half Blue / Half Black Bumpers | Intermediate fit for slightly oversized tiles |
| 153 mm (6.02") | All Black Bumpers | Standard 6" tiles (including Lowe's Daltile) |
| 152.5 mm (6.00") | Half Black / Half Orange Bumpers | Intermediate fit for standard to narrow tiles (including Home Depot Daltile) |
| 152 mm (5.98") | All Orange Bumpers | Narrow profile tiles |
| 151 mm (5.94") | Half Orange / Half Red Bumpers | Intermediate fit for very narrow tiles |
| 150 mm (5.91") | All Red Bumpers | True 150 mm tiles (such as older Lowe's Satori lines) |